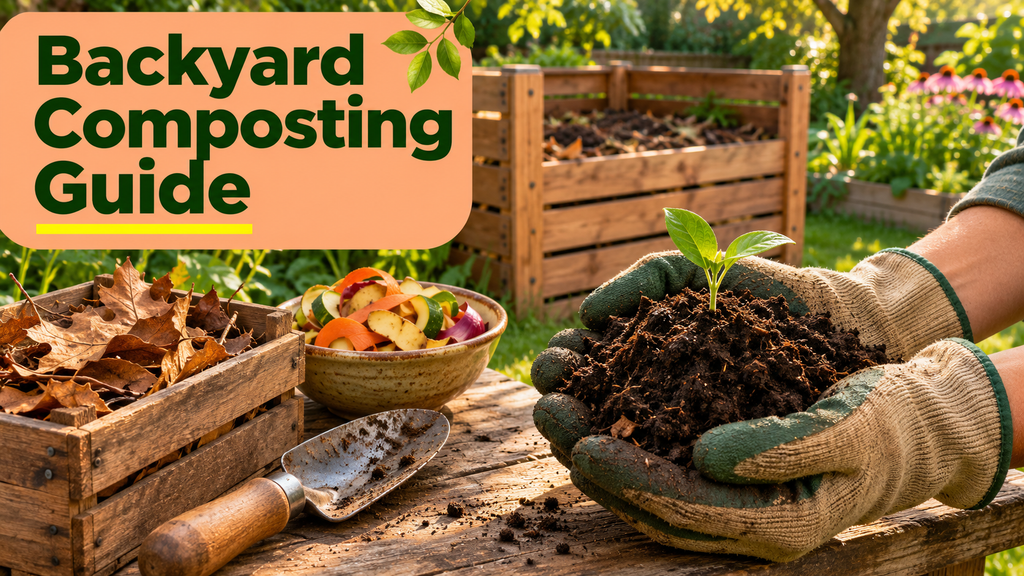
Backyard composting turns everyday kitchen scraps and yard waste into dark, crumbly, nutrient-rich soil. It costs very little, cuts the amount of trash you send to the curb, and gives your garden a natural boost that store-bought fertilisers often cannot match.
Many beginners worry that composting is smelly, messy or complicated. In reality, a well-managed compost pile is low-maintenance and smells like fresh earth. This guide covers how composting works, choosing the right bin, hot and cold composting, the right mix of materials, a seasonal care calendar, common problems and fixes, budgeting and the many ways to use finished compost around your home.
Table of Contents
How Composting Works
Composting is controlled decomposition. Bacteria, fungi, worms and insects break down organic materials into humus, a stable soil-like substance full of nutrients.
These organisms need four things to thrive:
- Carbon: Provided by dry, brown materials
- Nitrogen: Provided by fresh, green materials
- Oxygen: Supplied by turning or mixing the pile
- Moisture: About as damp as a wrung-out sponge
When these are balanced, the pile heats up, breaks down quickly and produces little odour. When one is missing, decomposition slows or smells develop.
Choosing the Right Compost Bin
The right container depends on your yard size, budget and how quickly you want results.
| Bin Type | Approximate Cost | Pros | Cons |
|---|---|---|---|
| Open pile | Free | Simple, handles large volumes | Can look untidy, attracts animals |
| Wire mesh bin | Low | Cheap, good airflow | Dries out quickly, less pest-proof |
| Wooden pallet bin | Low to free | Sturdy, easy to build | Wood eventually rots |
| Closed plastic bin | Low to moderate | Neat, holds heat and moisture | Harder to turn |
| Compost tumbler | Moderate to high | Fast, easy mixing, pest-resistant | Smaller capacity |
| Three-bay system | Moderate | Continuous compost production | Needs more space |
Single Bin vs Multi-Bin Systems
A single bin works well for most households. Gardeners who produce lots of yard waste often prefer a three-bay system: one bay for fresh material, one for active composting and one for finished compost.
Building a Simple DIY Bin
- Use four untreated wooden pallets tied together at the corners.
- Leave one side removable for easy access.
- Line the inside with wire mesh if pests are a concern.
- Add a lid made from plywood or a tarp to keep out heavy rain.
A bin of about 1 cubic metre (roughly 3 feet on each side) is large enough to heat up but still easy to manage.
Picking the Best Location
- Choose level, well-drained ground.
- Place the bin directly on soil so worms can move in.
- Find partial shade to prevent the pile from drying out in summer.
- Keep it close enough to the kitchen for easy trips.
- Stay a few feet away from fences, walls and neighbours’ windows.
- Make sure you can reach it with a wheelbarrow or garden hose.
Hot Composting vs Cold Composting
There are two main approaches, and both produce good compost.
Hot Composting
Hot composting creates a pile that reaches temperatures of around 55 to 65°C (130 to 150°F). Heat speeds up decomposition and can kill many weed seeds and plant diseases.
How to do it:
- Build a large pile all at once, at least 1 cubic metre.
- Mix about three parts browns to one part greens.
- Keep the pile evenly moist.
- Turn it every few days to every week.
- Monitor temperature with a compost thermometer.
Finished compost may be ready in as little as one to three months.
Cold Composting
Cold composting is slower but requires less effort. You simply add materials as they become available and turn occasionally.
How to do it:
- Add scraps and yard waste as you go.
- Cover fresh greens with browns each time.
- Turn the pile every few weeks if possible.
- Wait six months to a year for finished compost.
Cold composting is ideal for busy households, but it does not reliably kill weed seeds or diseases.
| Feature | Hot Composting | Cold Composting |
|---|---|---|
| Effort | Higher | Lower |
| Speed | 1 to 3 months | 6 to 12 months |
| Weed seed control | Good | Poor |
| Best for | Active gardeners | Busy households |
The Right Recipe: Greens and Browns
Green Materials
- Vegetable peels and fruit scraps
- Coffee grounds and filters
- Tea leaves
- Fresh grass clippings
- Green plant trimmings
- Manure from plant-eating animals such as chickens, rabbits or horses
Brown Materials
- Fallen leaves
- Straw and hay
- Shredded newspaper and plain cardboard
- Wood chips and sawdust from untreated wood
- Dried plant stalks
- Paper egg cartons
Keep These Out
- Meat, fish, bones and dairy
- Oils and greasy foods
- Pet waste from dogs and cats
- Diseased plants
- Weeds that have gone to seed, unless hot composting
- Glossy paper, coated cardboard and plastics
- Treated or painted wood
Chopping for Speed
Smaller pieces break down faster. Chop large scraps, shred leaves with a lawnmower and break up sticks before adding them to the pile.
Step-by-Step: Building Your First Pile
- Lay a base: Start with 10 to 15 cm of coarse browns such as twigs or straw to improve airflow.
- Add a green layer: Spread kitchen scraps or grass clippings.
- Cover with browns: Add a thicker layer of leaves or shredded paper.
- Sprinkle soil or finished compost: This introduces helpful microorganisms.
- Water lightly: Moisten each layer.
- Repeat: Continue layering until the bin is full or materials run out.
- Turn regularly: Use a garden fork or compost aerator to mix the pile.
Seasonal Compost Care Calendar
| Season | Main Tasks |
|---|---|
| Spring | Harvest finished compost, start a new pile, add fresh greens |
| Summer | Keep moist, turn often, avoid too many grass clippings at once |
| Fall | Collect and store leaves as browns for the year ahead |
| Winter | Keep adding scraps, insulate the bin, expect slower activity |
Saving Fall Leaves
Bag or pile extra leaves in autumn. They are the perfect brown material to balance kitchen scraps through the rest of the year.
Composting in Winter
Activity slows in cold weather, but you can still add scraps. Place a layer of leaves or straw over the pile to insulate it, and the pile will restart when temperatures rise.
Troubleshooting Common Compost Problems
The Pile Smells Bad
A rotten egg or ammonia smell usually means too much nitrogen or too little air.
- Add more browns.
- Turn the pile to add oxygen.
- Check that it is not waterlogged.
Nothing Is Happening
A cold, dry pile is often lacking nitrogen or moisture.
- Add fresh greens such as grass clippings or coffee grounds.
- Water the pile.
- Make the pile bigger so it holds heat.
Too Many Flies
- Bury food scraps in the centre of the pile.
- Always cover scraps with browns.
- Avoid adding meat or dairy.
Animals Are Digging In
- Use a closed bin or tumbler.
- Line the bottom with wire mesh.
- Keep meat, fish, dairy and greasy foods out.
- Do not leave fruit or food scraps exposed on top.
The Pile Is Soggy
- Add dry browns.
- Cover the bin during heavy rain.
- Turn more often to improve airflow.
Tools That Make Composting Easier
- Kitchen compost caddy with a lid
- Garden fork or pitchfork
- Compost aerator tool
- Compost thermometer for hot composting
- Garden hose or watering can
- Screen or sieve for finished compost
- Wheelbarrow for moving materials
Budgeting for Backyard Composting
Composting can be done for almost no cost, but some households choose to invest in equipment.
| Item | Typical Cost Range (USD) |
|---|---|
| DIY pallet bin | $0 to $30 |
| Plastic compost bin | $40 to $120 |
| Compost tumbler | $80 to $300 |
| Compost thermometer | $10 to $30 |
| Kitchen caddy | $10 to $40 |
| Aerator tool | $15 to $40 |
How Composting Saves Money
- Reduces spending on bagged soil, mulch and fertiliser
- Lowers trash volumes in areas with pay-per-bag or bin-size pricing
- Improves soil water retention, reducing watering costs
- Helps plants resist pests and disease, cutting treatment costs
Many local governments also offer discounted compost bins or free workshops, so check with your city or county before buying.
Using Your Finished Compost
Compost is ready when it is dark brown, crumbly and smells earthy, with no recognisable food scraps.
Garden Beds
Mix 5 to 8 cm of compost into vegetable and flower beds before planting to improve soil structure and fertility.
Lawns
Spread a thin layer, about 1 cm, over your lawn in spring or fall and rake it in. This feeds grass and improves soil.
Trees and Shrubs
Apply compost around the base of trees and shrubs, keeping it a few centimetres away from trunks.
Containers and Raised Beds
Blend compost with potting mix for healthier container plants and raised beds.
Compost Tea
Steep a shovel of compost in a bucket of water for a day or two, strain it and use the liquid to water plants.
Composting and Your Home
A well-maintained compost area can be part of an attractive, productive garden. Keep it tidy, neat and pest-free to avoid neighbour complaints or issues with homeowners’ associations.
Some HOAs or rental agreements set rules about compost bins, so check before setting one up. It is also worth reviewing your home insurance, since damage from rodents or wildlife is often excluded, making prevention through good compost management even more important.
Final Thoughts
Backyard composting is a simple, rewarding way to reduce waste and build healthier soil. Choose a bin that suits your space, balance green and brown materials, keep the pile moist and well aerated, and decide whether fast hot composting or easy cold composting fits your lifestyle.
With regular care through the seasons and quick fixes for common problems, you will soon have a steady supply of rich compost for your garden beds, lawn, trees and containers, saving money while giving back to the earth.
Frequently Asked Questions
1. How long does backyard compost take?
Hot composting can produce finished compost in one to three months, while cold composting usually takes six months to a year.
2. What is the best ratio for compost?
A good guideline is about three parts brown materials, such as leaves and paper, to one part green materials, such as food scraps and grass clippings.
3. Why does my compost smell bad?
Bad smells usually mean too many green materials, too much moisture or not enough air. Add browns and turn the pile to fix it.