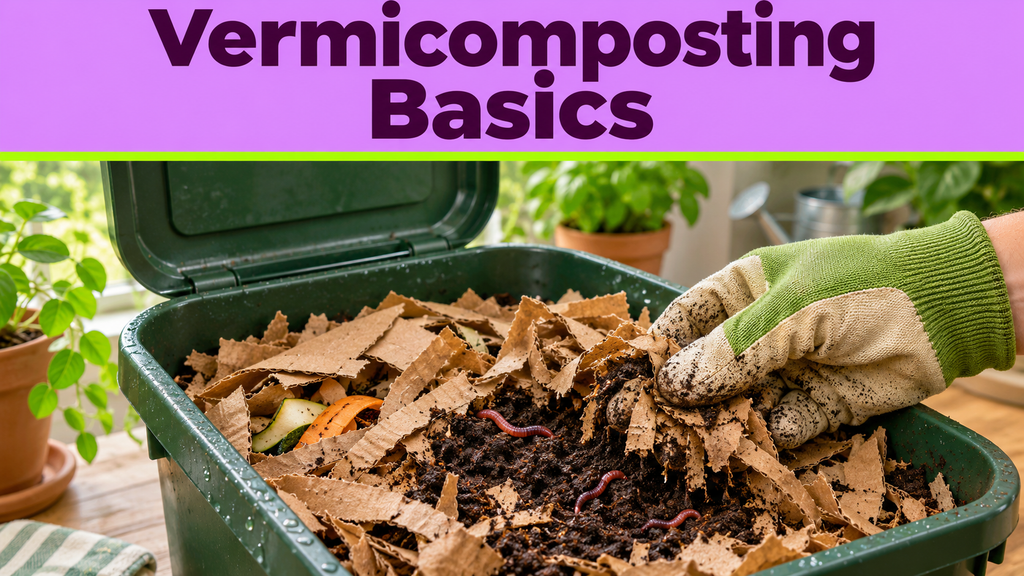
Vermicomposting is a simple way to turn kitchen scraps into rich, natural fertiliser with the help of worms. It works indoors or outdoors, takes up very little space and is one of the best composting options for apartments, condos and small homes without a backyard.
A healthy worm bin does not smell, does not attract pests when managed properly and produces worm castings, a soil amendment many gardeners consider one of the best natural fertilisers available. This guide explains how vermicomposting works, which worms to use, how to build or buy a bin, what to feed your worms, daily and monthly care, harvesting castings, solving common problems, typical costs and how to use the finished product.
Table of Contents
What Is Vermicomposting?
Vermicomposting is the process of using worms to break down organic waste. Worms eat food scraps and bedding, then release castings, also called worm compost or vermicast. These castings are packed with nutrients and beneficial microbes that help plants grow.
Unlike traditional compost piles, worm bins do not need to heat up. The worms and microorganisms do the work at room temperature, which is why vermicomposting is so well suited to indoor spaces.
Vermicomposting vs Traditional Composting
| Feature | Vermicomposting | Traditional Composting |
|---|---|---|
| Space needed | Very small, indoors or outdoors | Yard or garden area |
| Main workers | Worms and microbes | Microbes, fungi and insects |
| Heat produced | Little to none | Can reach high temperatures |
| Best materials | Fruit and vegetable scraps, paper | Food scraps and large volumes of yard waste |
| Finished product | Worm castings | Compost |
| Time to first harvest | About 2 to 4 months | A few months to a year |
Choosing the Right Worms
Not all worms are suitable for composting. Garden earthworms that dig deep tunnels will not thrive in a bin.
Red Wigglers
Red wigglers (Eisenia fetida) are the most popular composting worms. They live in the top layer of organic matter, eat large amounts of food, reproduce quickly and tolerate a range of indoor temperatures.
European Nightcrawlers
European nightcrawlers are larger and slightly slower eaters. They are useful for gardeners who also want worms for fishing bait or for larger bins.
How Many Worms Do You Need?
A common starting point is about 0.5 kg (1 pound) of worms for a small household bin. Worms can eat roughly half their body weight in food each day once they are settled, and their population will grow as long as conditions are good.
Where to Buy Worms
- Local worm farms and composting suppliers
- Garden centres and nurseries
- Online worm retailers that ship live worms
- Community composting groups or friends with established bins
Do not use worms dug from your garden, as they are usually not composting species.
Setting Up a Worm Bin
Choosing a Container
You can buy a ready-made worm bin or build your own.
- Plastic storage tote: Affordable and easy to adapt.
- Wooden box: Breathable and keeps moisture balanced, but may wear out over time.
- Stacking tray system: Commercial bins with multiple trays make harvesting easier.
- Continuous flow bin: Worms feed at the top while castings are collected from the bottom.
A bin around 40 to 60 litres is a good size for one or two people.
Building a Simple DIY Bin
- Choose an opaque plastic tote with a lid.
- Drill small holes, about 6 mm, in the lid and around the upper sides for airflow.
- Drill a few drainage holes in the bottom.
- Place the bin on bricks or blocks over a tray to catch excess liquid.
- Add bedding and worms, then begin feeding gradually.
Preparing Bedding
Bedding gives worms a home and balances moisture. Good bedding materials include:
- Shredded newspaper or plain paper
- Shredded cardboard and egg cartons
- Coconut coir
- Dry leaves
- Small amounts of garden soil or finished compost to introduce microbes
Moisten the bedding until it feels like a wrung-out sponge, then fill the bin about two-thirds full. Fluff it so air can circulate.
Picking a Location
- Keep the bin between about 15 and 25°C (59 to 77°F).
- Avoid direct sunlight, which can overheat the bin.
- Protect outdoor bins from freezing and heavy rain.
- Good indoor locations include under the sink, in a utility room or in a closet.
What to Feed Your Worms
Good Foods
- Vegetable peels and scraps
- Fruit scraps (in moderation)
- Coffee grounds and paper filters
- Tea leaves and paper tea bags
- Crushed eggshells, which add grit and calcium
- Small amounts of cooked plain rice, pasta or bread
Foods to Avoid
- Meat, fish and bones
- Dairy products
- Oily or greasy foods
- Salty or heavily spiced foods
- Large amounts of citrus peels and onions
- Garlic and very spicy peppers
- Pet waste
Feeding Tips
- Chop or blend scraps into small pieces for faster processing.
- Bury food under the bedding to reduce fruit flies and smells.
- Feed in a different spot each time.
- Start slowly for the first few weeks while worms settle in.
- Check whether previous food has been mostly eaten before adding more.
- Freeze scraps first to break down cell walls and kill fruit fly eggs.
Daily, Weekly and Monthly Care
| Frequency | Tasks |
|---|---|
| Every few days | Add small amounts of food and bury it under bedding |
| Weekly | Check moisture, fluff bedding, look for leftover food |
| Every 2 to 4 weeks | Add fresh dry bedding, drain any excess liquid |
| Every 2 to 4 months | Harvest castings and refresh bedding |
Managing Moisture
The bin should be moist but not soggy. If it is too wet, add dry shredded paper or cardboard. If it is too dry, mist it lightly with water.
Keeping Air Flowing
Worms need oxygen. Fluff the bedding gently with a hand fork and keep the air holes clear.
Harvesting Worm Castings
After two to four months, the bin will contain dark, crumbly castings. There are several ways to separate worms from the finished material.
Side-to-Side Method
Push all contents to one side of the bin. Add fresh bedding and food to the empty side. Over a few weeks, worms move to the new food, leaving castings ready to harvest.
Stacking Tray Method
In tray systems, add food to a new tray placed on top. Worms migrate upward, leaving the lower tray full of castings.
Light Method
Dump the bin contents onto a tarp in bright light and form small cone-shaped piles. Worms move away from light toward the centre. Scrape castings off the top and sides, then collect the worms at the bottom.
Storing Castings
Keep castings in a breathable bag or container with a little moisture. Use them within a few months for the best results.
Common Problems and Solutions
| Problem | Cause | Solution |
|---|---|---|
| Bad smell | Overfeeding, too wet or poor airflow | Feed less, add dry bedding, fluff contents |
| Fruit flies | Exposed food or overripe fruit | Bury food, freeze scraps, cover with bedding |
| Worms escaping | Too wet, too acidic or too hot | Add dry bedding, reduce citrus, move to a cooler spot |
| Worms dying | Extreme temperatures or dry bedding | Adjust location and moisture |
| Mould | Excess food | Remove mouldy food and feed less |
| Slow processing | Too few worms or large food pieces | Chop scraps smaller and be patient |
Dealing With Pests
Small mites and springtails are normal in many bins and help break down material. Large numbers of fruit flies can be controlled by trapping them with a jar of vinegar and covering food thoroughly.
Costs of Getting Started
Vermicomposting is affordable, especially if you build your own bin.
| Item | Approximate Cost (USD) |
|---|---|
| DIY plastic tote bin | $10 to $25 |
| Commercial stacking worm bin | $60 to $200 |
| Red wiggler worms (0.5 kg) | $30 to $60 |
| Coconut coir bedding | $10 to $20 |
| Hand fork and spray bottle | $10 to $20 |
Ways Vermicomposting Saves Money
- Produces free fertiliser for houseplants and gardens
- Reduces purchases of potting soil amendments
- Cuts food waste and garbage volumes
- Lowers costs in areas that charge by bin size or bag
- Supports healthier plants that need fewer treatments
Some cities and local governments offer discounted worm bins or free workshops, so check what is available in your area.
Using Worm Castings
Worm castings are gentle and will not burn plant roots, making them safe for almost any plant.
Houseplants
Mix a small amount of castings into potting soil or sprinkle a thin layer on top of the soil every few months.
Seed Starting
Blend castings into seed-starting mix to give seedlings a strong start.
Vegetable Gardens
Add castings to planting holes or work them into the soil around plants during the growing season.
Lawns
Spread a thin layer over the lawn and water it in.
Worm Casting Tea
Steep a handful of castings in water for a day, strain and use the liquid to water plants. Use it promptly for the best results.
A Note on Bin Liquid
Liquid that drains from the bin, sometimes called leachate, may contain partly broken-down material. Dilute it heavily with water before using it on non-edible plants, or simply discard it if it smells unpleasant.
Vermicomposting for Schools, Offices and Businesses
Worm bins are popular in classrooms, community gardens and offices. They teach children about science and sustainability, reduce food waste from staff kitchens and provide castings for landscaping. Businesses such as cafés and restaurants can use worm bins for vegetable scraps, though larger operations may need commercial composting services.
Organisations should assign someone to look after the bin, set feeding rules and keep it clean to avoid odour complaints.
Final Thoughts
Vermicomposting is an easy, space-saving way to recycle kitchen scraps into valuable worm castings. With the right worms, a well-ventilated bin, moist bedding and careful feeding, you can maintain a healthy system indoors or outdoors with just a few minutes of care each week.
Start small, avoid overfeeding, keep the bin at a comfortable temperature and harvest castings every few months. Your houseplants, garden and wallet will all benefit.
Frequently Asked Questions
1. What worms are best for vermicomposting?
Red wigglers are the most popular choice because they eat quickly, reproduce well and thrive in the top layers of a worm bin.
2. Does a worm bin smell?
A healthy worm bin should smell earthy. Bad smells usually mean overfeeding, too much moisture or poor airflow.
3. How long does it take to get worm castings?
Most worm bins produce harvestable castings in about two to four months, depending on the number of worms and how they are fed.